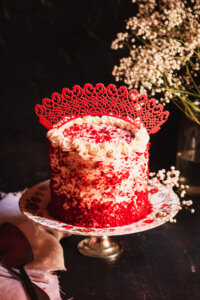
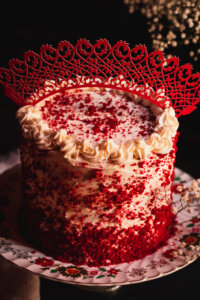
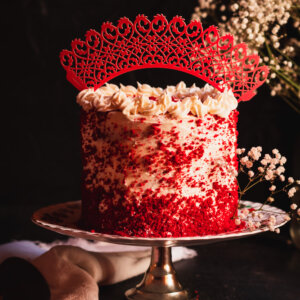
Red Velvet Cake with Buttercream Frosting
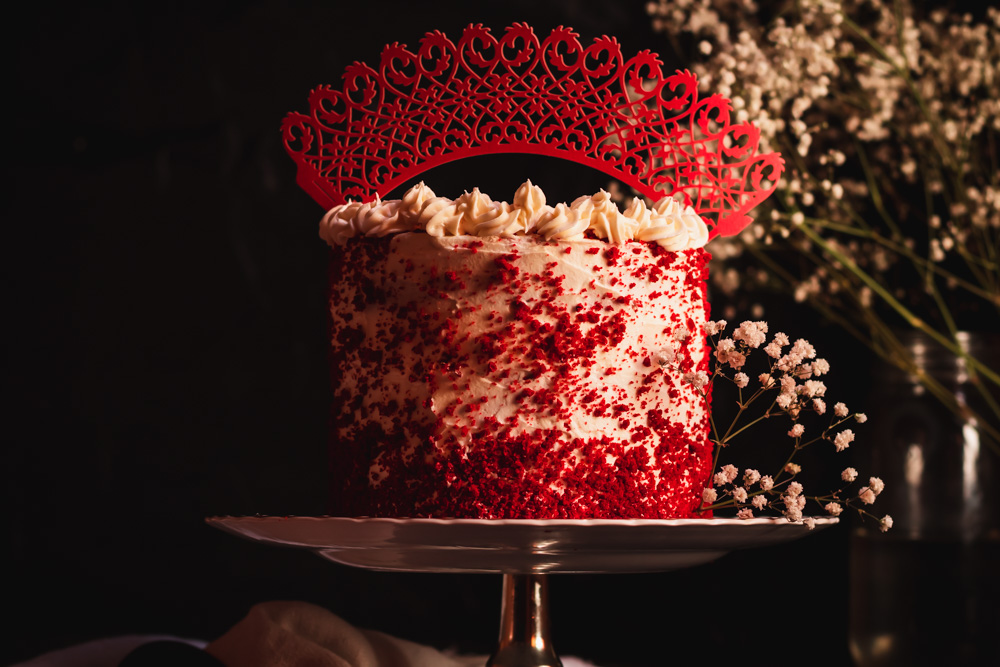
Would you believe that this is the second time I’m making a layered cake. This red velvet cake is so delicious, made with buttercream and decorated with the yummiest buttercream frosting. You really do to need any special equipment to make layered cake. I’ve been making my layered cake with one baking tin to make all the layers and using a spatula as a cake scraper to decorate the cake. This red velvet cake was inspired by my niece’s birthday as she really like red velvet flavor.
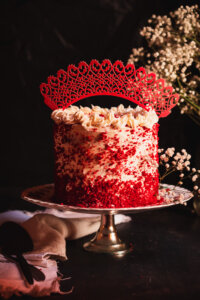
The combination of buttercream and vanilla with a little cacao powder makes tis cake so delicious and velvety. The best part about this cake is the sweet and creamy frosting, made from a simple butter and sugar mix but produces a very soft, moist and velvety cake.
How To Make Red Velvet Cake with Buttercream Frosting
With basically any cake, start by mixing your dry ingredients then add the wet ingredients and combine together. The buttermilk and the hint of red makes all the difference.
- All-purpose flour. this is the base of the cake and you need to sift the flour to make sure there’re no lumps in the flour.
- Unsweetened Cacao Powder. Yu need just a little of cacao powder so that not to overpower the vanilla ad butter.
- Buttermilk. This is the secret ingredient of the red velvet cake . It helps create a moist and delicious cake and also helps activate the baking soda to leaven the cake. You can easily make buttermilk by combining milk and vinegar.
- Oil. You may use any non flavored vegetable oil
What Food Coloring To Use
Food coloring are a bit controversial. I only use them if I’m trying to achieve a specific color. For this cake I recommend gel food coloring. They are highly concentrated and you require just a little bit. This color is deep and a little goes a long way.
I hope you enjoy making this cake like I did. Also check out my Salted caramel cake here.
Red Velvet Cake with Butter Cream Frosting
Ingredients
- 2 1/2 cups All-purpose flour
- 1 cup Sugar
- 1 tbsp Baking powder
- 1/2 tsp Baking soda
- 1/2 cup Cacao powder
- 1/2 Vegetable oil
- 3 drops Red red gel coloring
- 2 Eggs
- 1 cup Milk
Buttercream Frosting
- 1 cup Softened unsalted butter
- 3 cups Fine sugar
- 2 tbsp Milk
Instructions
- Sieve flour and add sugar, cacao powder, baking powder, soda and salt and combine.
- Add eggs and beat with an electric hand mixer. Slowly add milk and oil and combine
- Add the food coloring until you get the right red color.
- Prepare the baking pans by oiling and flouring then divide the batter into 3 portions. if using one baking tin, cook each layer at a time.
- Bake in a preheated oven at 180 degrees C and bake for 35 minutes or until a toothpick inserted comes out clean.
- Prepare the frosting by beating butter for 5 minutes using the hand mixture until it turns from yellow to white. Add fine sugar in bits and beat on high until the frosting is thick. Add milk as needed to thin it out.
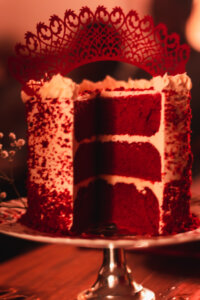
- Once the cakes have baked and cooled completely start assembling.
- Level the cakes by trimming the top until they're all flat
- Place the first layer on a cake stand and spread the frosting on top, put the next layer and repeat until all the layers are up. Spread the frosting on the sides of the cakes until the cake layers are coated with frosting.
- Blend the cake pieces we cut out into a crumble and spread on the cake as you wish.
- Refrigerate and enjoy after.